Learn How To Draw An Ampersand Like A Pro
Drawing an ampersand is easier than you think. The elegant symbol, often overlooked, can add flair to your projects. Begin with a simple S shape, then loop back for the distinctive and eye-catching design. Practice a few times, and soon you’ll be able to draw an ampersand with confidence. Let’s dive into the art of crafting this beautiful symbol.

How to Draw an Ampersand: A Fun Guide for Kids
Welcome, young artists! Today, we are going to dive into the exciting world of drawing and learn how to create a special character called an ampersand. The ampersand (&) is not just any symbol—it’s a unique and stylish way to represent the word “and.” In this fun and detailed guide, we will explore different techniques and tips to help you master the art of drawing an ampersand. So, grab your pencils and paper, and let’s get started!
Understanding the Ampersand
Before we begin drawing, let’s take a closer look at what an ampersand is and where it came from. The ampersand symbol has a long history and was originally created as a ligature of the letters “e” and “t,” forming the Latin word “et,” which means “and.” Over time, the ampersand evolved into the symbol we know today, with its beautiful and intricate design.
Gathering Your Drawing Supplies
Before we start drawing our ampersand, let’s make sure we have all the necessary supplies. You will need:
- A pencil
- A piece of paper
- An eraser
Once you have all your supplies ready, find a comfortable and well-lit space to begin your drawing adventure!
Step-by-Step Guide to Drawing an Ampersand
Now, let’s walk through the step-by-step process of drawing an ampersand. Follow along closely and take your time with each step to create a beautiful and unique symbol.
Step 1: Drawing the Basic Shape
Start by drawing a small oval shape at the center of your paper. This will be the starting point for our ampersand.
Step 2: Adding the First Curve
Next, draw a curved line that connects the top left of the oval to the bottom right. This curve will form the top part of the ampersand.
Step 3: Creating the Second Curve
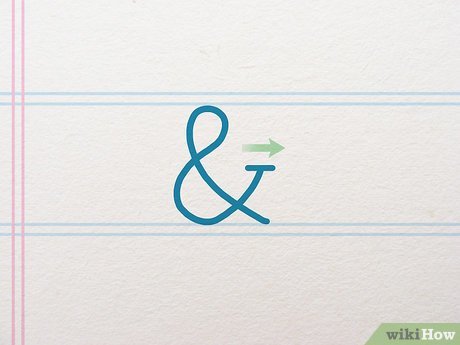
Now, draw another curved line that connects the top right of the oval to the bottom left. This curve will form the bottom part of the ampersand.
Step 4: Adding the Final Touches
To complete your ampersand, add a small loop at the intersection point of the two curves. This loop will give your ampersand its final flourish and style.
Tips for Perfecting Your Ampersand
Now that you’ve drawn your first ampersand, here are some tips to help you perfect your technique:
- Practice tracing the symbol until you feel confident in drawing it freehand.
- Experiment with different sizes and styles to make your ampersand unique.
- Use light pencil strokes initially, so it’s easier to make corrections if needed.
Fun Ways to Use Your Ampersand Drawings
Congratulations on learning how to draw an ampersand! Now, let’s explore some creative ways to use your newfound skill:
- Create a personalized greeting card with ampersands as decorations.
- Add ampersands to your school projects to make them stand out.
- Practice drawing multiple ampersands to create a decorative border for your artwork.
Learning how to draw an ampersand is a fun and rewarding experience that allows you to express your creativity through art. By following the step-by-step guide and practicing regularly, you can master the art of drawing this unique symbol. So, keep doodling, experimenting, and unleashing your artistic talents with the ampersand!
Remember, art is all about creativity and exploration, so don’t be afraid to try new things and make your ampersands uniquely yours. Happy drawing!
How to Draw an AMPERSAND
Frequently Asked Questions
What materials do I need to draw an ampersand?
To draw an ampersand symbol, you will need a pencil, a pen, paper, and a ruler. These basic supplies will help you create clean and precise lines for your ampersand.
What is the best way to start drawing an ampersand?
To start drawing an ampersand, begin by sketching out the outline of the symbol using a pencil. You can use a ruler to ensure straight lines and perfect angles. Take your time to get the shape just right before moving on to the next step.
How can I add style and flair to my ampersand drawing?
To add style to your ampersand, consider playing around with different line weights or adding embellishments like swirls or curls to the design. Get creative with how you connect the letters ‘E’ and ‘T’ to form the symbol to make it unique and visually appealing.
Are there any online tutorials I can follow to improve my ampersand drawing skills?
Yes, there are numerous online tutorials and resources available that can help you improve your ampersand drawing skills. You can find step-by-step guides, video tutorials, and examples to inspire and guide you in creating beautiful ampersand symbols.
Final Thoughts
Mastering the art of drawing an ampersand can elevate your design skills. Start by creating a simple vertical line with a loop at the top. Then, connect the loop with a smaller curved line. Remember, practice makes perfect when learning how to draw an ampersand. Enjoy the process and embrace the creativity it brings to your projects.